How to Create User-Defined Fields in Sage 100 ERP
Since thousands of types of businesses run on ERP systems, a one-size-fits-all approach does not apply. The good news is Sage 100 ERP can be personalized to fit a business’s unique needs and most effectively run it. Here, we show you how to create user-defined fields, which is one of the most common customizations.

In Sage 100 ERP, an end user can easily create a custom field without doing any programming or having any SQL knowledge. Let’s go through the process to create a custom field in Customer Maintenance. We’ll call it “Territory.”
First, you will need to go to Custom Office: Main.
Here, go to the “User Defined Field and Table Maintenance” screen [Image 1], where you will see an extensive list of all the customizable screens. Find the Accounts Receivable module and right-click on “AR Customer Maintenance.” Double click to make this selection and you will now be able to choose “Edit Fields.”
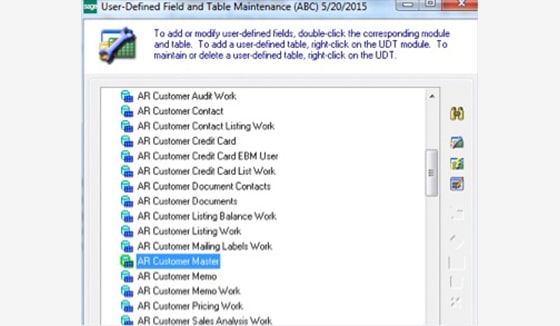
Image 1
Now you should be in the “User-Defined Fields” screen [Image 2]. To add the new field, click the green circle with the plus sign inside it.
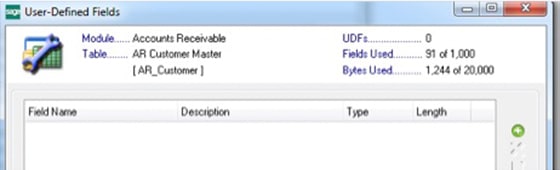
Image 2
You are now in the “Add Field” screen [Image 3]. This is where you type in the name of the field. To activate the field so text may be typed in that space, select the “Manual Entry” option. If you choose the “Business Object” option, you may populate this field from an existing one within the system.
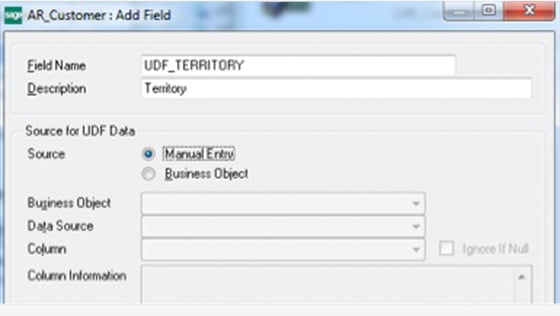
Image 3
This takes you to the “AR Customer Master : Add Field” screen [Image 4].
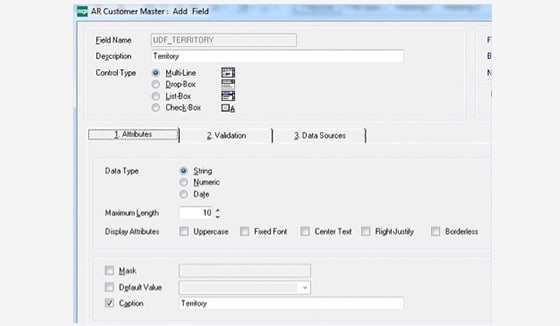
Image 4
Here, you decide how the field should look on the screen.
1. Attributes Tab
Control Type—
Multi-Line: user manually enters data Drop-Box, List-Box, or Check-Box: User is restricted, and must pick from pre-defined choices.
Data (Field) Type—
The data type can be set to String, Number, or Date. This can be an important decision if you want to report the data in this field.
Maximum Length—
We also can set the size of the field. To add something like a Notes UDF, the max size limit is 8,000.
2. Validation Tab
Here, you will find an option to require the field name. This can be helpful if you want to make sure the end user fills out this field before closing the open record.
Lastly, we need to add the field to the screen.
There are two ways to do this:
- Go into the Custom Office module: Customizer Panel Selection
- Go to the Customer Maintenance screen: and click the shortcut Ctrl – F9.
Here, you can choose to modify an already customized screen or create a new one. You can also choose who will get the customization, and make it user- or company-specific. OR, you can assign it to all users and all companies by clicking the “All” check boxes on the upper right [Image 5].
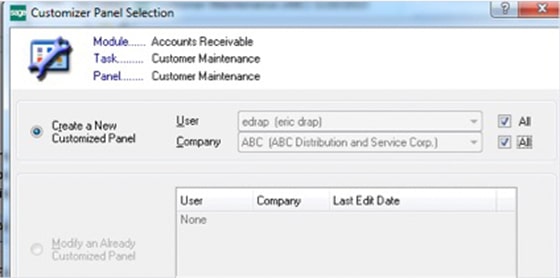
Image 5
Now it’s time to customize the layout.
On the next screen, we need to click the new field button, then draw the field in the desired position on the screen. We can also move around the standard fields. If there are many user-defined fields (UDFs), we can add an additional tab or a button to opens a new screen to hold these fields.
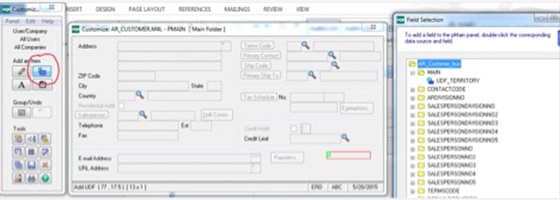
Image 6
To finish up, in the Field Selection screen, select the new field. Then, close and save the customizer.
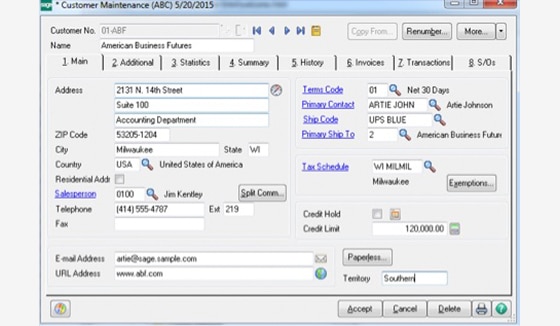
Image 7
Now, when we open Customer Maintenance we can see our new field that has the same look and feel as all the standard fields of Sage 100 ERP! And you created this all without any coding whatsoever!