Create a Custom List View in Intacct
List views are a tremendously helpful way to review data elements and transactions in Intacct. What if you would like to see additional data or customize the view? In those cases, you can take advantage of Intacct’s custom list view solution.
First of all, a standard list view of AP Bills shows the Vendor Name, Bill Number, Date, Amount and Status (i.e. Draft, Submitted, Posted, etc.). A custom list view can let you see additional information and/or restrict the transactions that you see based on chosen filter criteria.

How do you create a custom list view in Intacct?
We’ll use the example of creating a custom list view for an Accounts Payable bill with a balance due.
Step 1
In Intacct, go to the Accounts Payable module.
Go to the “Bills” screen to see the standard view of this list (Image 1).

Image 1
Step 2
Go to “Manage Views.”
In the drop-down menu, select “Create New View” (Image 2).
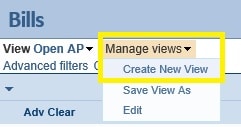
Image 2
Step 3
Check the box next to each AP Bill item that you’d like to view in the list (Image 3).
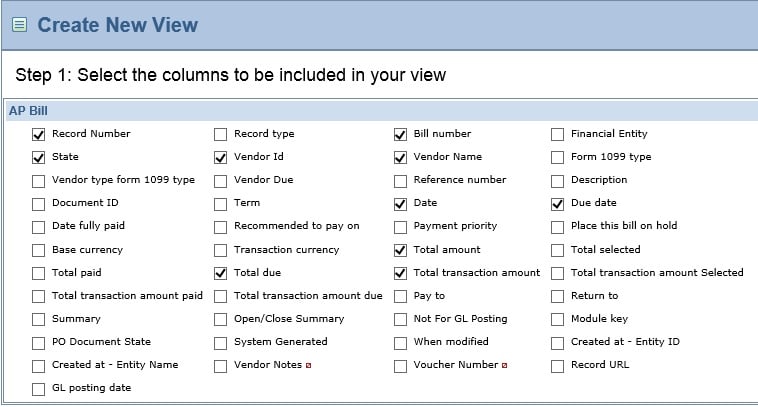
Image 3
Step 4
In the Create New View screen, select the column sequence for your list (Image 4).
Drag and drop the fields to move them in the order you want to see them.
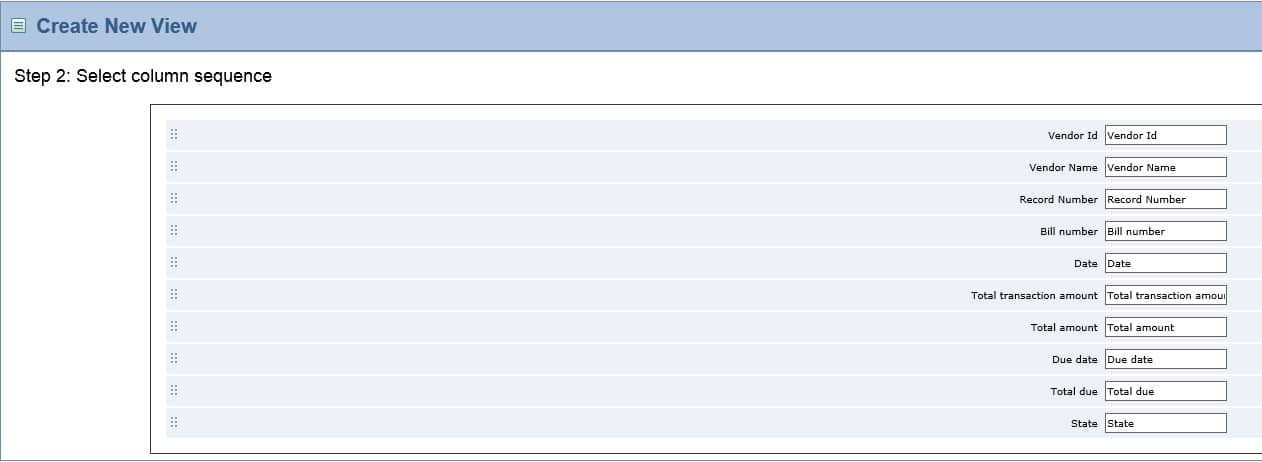
Image 4
Step 5
When you reach the “Create New View” screen with the title “Step 3: Select filters,” use the drop-down menus for columns, operator, and value to set any filters on the data elements to restrict the data in your view (Image 5).
In our example, we set the “Total due not equal to zero” so we can only view bills with a balance due.
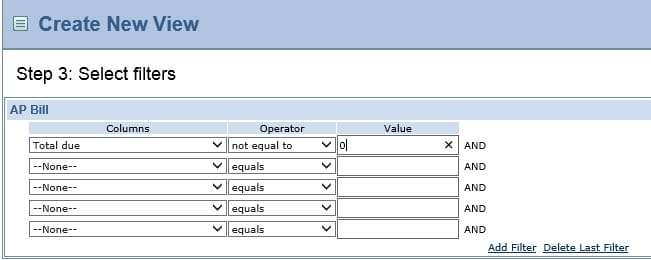
Image 5
Step 6
You are now in the “Create New View” screen with the title, “Step 4: Sort your results” (Image 6).
Here, you will select the sort order for each of the columns you wish to view.
Drag and drop the fields to provide additional sorting functionality for multiple columns of data.
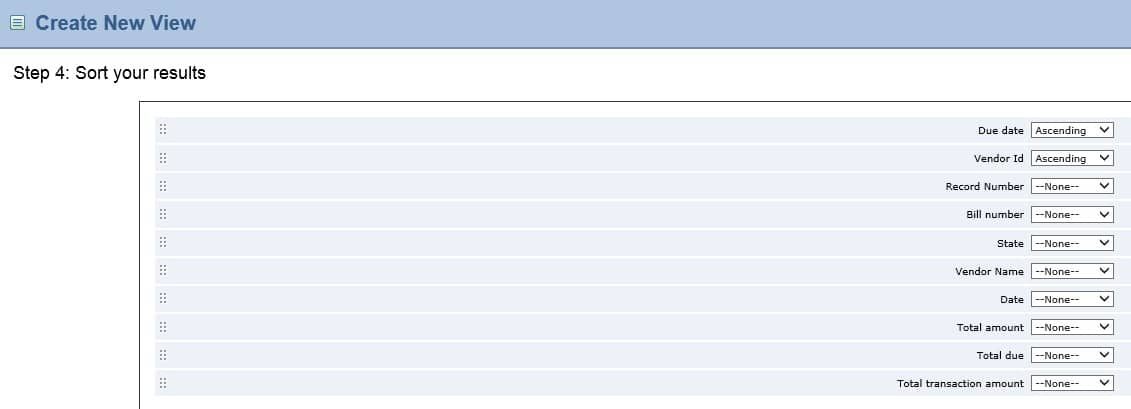
Image 6
Step 7
You are now in the “Create New View” screen with the title, “Step 5: Describe your view” (Image 7).
Finally, here you may give the view a name that provides insight into the content.
Select “Deploy” to use the new custom list view.
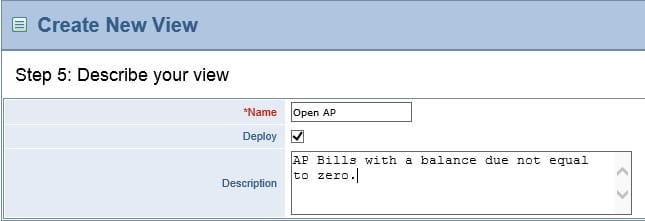
Image 7
Step 8
Once the custom list view has been created, you can select its name from the “View” drop-down menu.
You will see these standard options: All, Recently Viewed, Recently Modified, and All Recently Modified as well as a list of all of the custom list views you have created.

Image 8
Custom list views can be created throughout Intacct, and are an easy way to get the exact data you need without having to run reports or look through thousands of transactions for a small data set. This is an extremely powerful tool for users with access to it, not to mention it frees up system administrators from taking the time to create these lists.
To learn more about using Intacct for your business, please contact a MicroAccounting representative. We look forward to talking with you.